March 26, 2010

Black Beans and Rice


I know I said I'd be back to post about my birthday cupcakes, but I actually have this delicious black bean and rice dish banked, and if I don't post about it now, I know I'll forget and it will never happen. But don't worry! The cupcakes are coming! And you're not losing anything by getting this post first. In fact you're gaining because this dish is delicioussss! And really quick and simple! It's also versatile.
The first thing you need to do is cook up some rice. One cup (dry) to be exact. I didn't take a photo of rice cooking, though, for what I feel are obvious reasons. It's boring. It's self-explanitory.


The real fun starts with what I call the "dressing." In a large bowl you combine olive oil, lime (or lemon) juice, chili powder, ground cumin, turmeric, crushed garlic, salt, pepper and a can of green chilies. We use mild chilies because we don't like spicy food that much, but you can use any kind of green chilies, depending on how spicy you like your food!


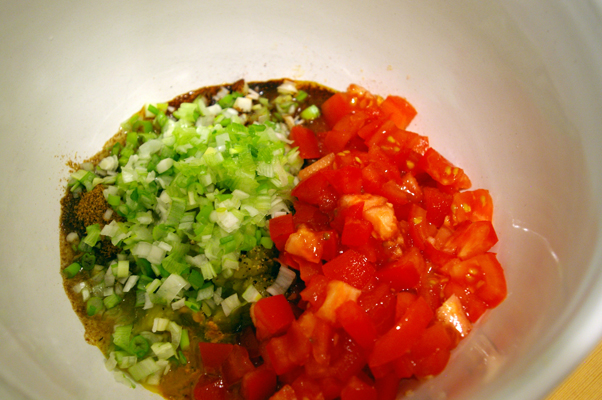
Add in some chopped green onions and tomato...


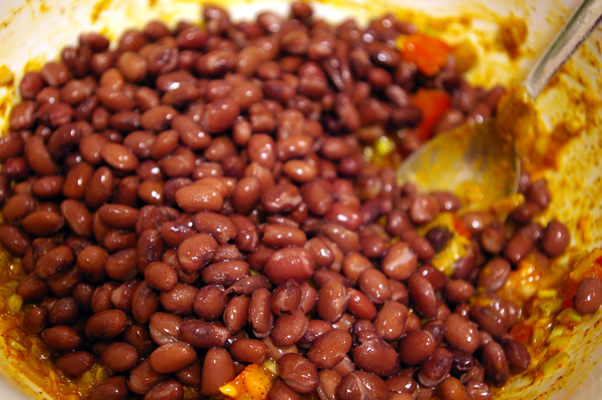
and a can of black beans (rinsed thoroughly first, of course!).


Give it a good stir and wait for your rice to finish.


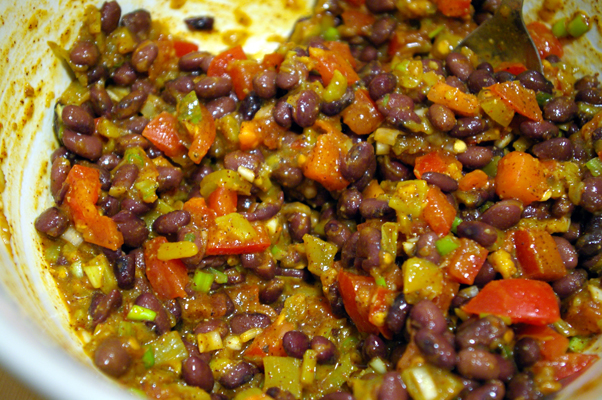
Then throw your rice in (we like basmati), mix it up well, again, and serve!


It's really that simple. Now, you may be wondering how you serve this dish. Well, as I said, it's versatile! The recipe is originally a wrap filling. Whip up some guacamole and your own tortillas, if you're feeling ambitious, chop up some lettuce and cheese and you've got yourself some delicious and healthy wraps. I've also baked this, with cheese on top! I've also stuffed peppers with it and baked them in the oven! But normally, we just eat it as a side dish with some form of protein (meat for Anders, vegetarian hot dogs for me, usually), and some cooked vegetables! It's really very tasty and when you can use it for so many things, you can't really go wrong! It keeps well in the fridge and makes a great quick snack as leftovers.

Now, before I move on to the recipe, I wanted to give myself a little shameless plug. I'm starting a very long photography project tomorrow, and while I don't know how many people actually read this blog regularly, I thought I'd plug it here, in case anyone who does read it is interested! There's nothing up there, now. My first post will appear at 12AM, eastern time. Thanks!

Recipe
Black Beans and Rice

1 cup dry rice, cooked
1-2 tablespoons olive oil
2 tablespoons lime (or lemon) juice
2 teaspoons chili powder
1 teaspoon cumin
1/2 teaspoon turmeric
1 medium clove garlic, crushed
salt and pepper to taste
1 can (114 ml) (mild) green chilies
1 cup tomato, chopped
6 green onions, diced
1 can (540 ml) black beans, drained and well rinsed

Cook rice and set aside. Meanwhile, in a large bowl combine the remaining ingredients. Add cooked rice and mix well. Serve as a side dish, baked with cheese on top, or stuffed in peppers.

Guten Appetit!
Continue reading...

March 13, 2010

Cake Mix Cookies


I am fo' realz back, only ten days after my last post. BAM. And I have these really easy and tasty cookies to share. All you need is a box of cake mix (any flavour), vegetable oil, eggs, chocolate chips and some oats, if you want. A bowl is probably good, too.


Start simple: beat some eggs.


Throw your cake mix and some oats, if you want them, into a bowl.


toss in the eggs, oil and chocolate chips.


Stiiiir it up, little darlin'.

I missed taking a photo of this but scoop the batter into about 2-tablespoon-sized balls and put them on a baking tray. Then bake them.


They will look and smell delicious when they come out of the oven.


These were the last three cookies left... about 36 hours after I had baked them.


Recipe

Cake Mix Cookies
1 boxed cake mix (any flavour)
¾ cup rolled oats (optional)
2 eggs, lightly beaten
½ cup oil
¾ cup semi-sweet chocolate chips

Preheat the oven to 350°F. In a large bowl combine all ingredients, mixing well. Spoon batter in about 2-tablespoon-sized balls and place on a baking tray. Bake in preheated oven for 10-12 minutes. Cool briefly on trays before removing to wire rack to cool completely.

Guten Appetit!
Continue reading...

March 03, 2010

Anders' 23rd birthday cake and a tasty version of Wilton's buttercream frosting


I have no excuses for how long I've left this blog, except to say that, while I love cooking and baking, I haven't been feeling the urge to do it that often recently. Also, I've been trying to get back into shape after hardly being able to exercise at all for about four months, and eating homemade baked goods doesn't fit into that plan very seamlessly.
Nevertheless, I am here to report on the birthday cake I made for Anders this year! The photo above is just a teaser...

OK... so I really wanted to document this whole process with photos, but there were a couple factors involved in my failure to do that. 1) I was a nervous WRECK because I was, with the help of some friends and the cooperation of the entire cross-country/distance track team, planning and trying desperately to pull off a surprise party for Anders, so I was really busy, and 2) I'm out of practice so I just... forgot. See, I finally found this amazing recipe for a classic vanilla, yellow cake, which I used, and I wanted so badly to share it with everyone. And I will! My birthday is two weeks from tomorrow, and I'm planning on making cupcakes with this recipe for my classes (because I'm 22 going on 7 apparently), so I will post it then! I promise!

So what is this post all about then, if not a super awesome recipe for yellow cake? Well, this year was the first time I ever tried to do anything fun with Anders' birthday cake. I decided to make a 9x13 sheet cake and FROST A TRACK ONTO IT.


BAM.


Anders' birthday tends to fall right around the middle of indoor track season for Canadian universities, and most (if not all) of our friends are runners, so I thought it was appropriate. I went out and bought the pan specically for it. I also bought Wilton frosting tip #233 to make real-looking grass AROUND the track. Want to see a detail photo of that?


BAM.


It was a lot of fun to do! The only problem was that I kept melting the frosting in my hands, which is why you can see spots where the frosting is just a big blob on the cake... See, I had to keep a desk lamp out in the kitchen so I could see my colours properly and make sure they were mixing correctly. Plus my hands were flippin' hot from being so nervous. It wasn't a great combination. But everyone was really impressed and even though when I look at the photos now I think "it looks like a 12 year-old frosted that cake..." I'm pleased with how it turned out and how happy Anders was with it, and how much everyone at the party liked it.

Also, if you look at it from an artsy angle and kind of unfocus the one end (as if you're a camera lens.........) it looks way better.


BAM.


Seriously, though. I'm sorry I was away for so long. I made cookies a couple of days ago so I'll post those soon, and I promise I'll make delicious cupcakes and post about those too in the next couple of weeks. So there are a few things to look forward to in the near future!

Oh, and in case you're wondering, I used the Wilton buttercream frosting recipe to frost this cake. I've posted about this recipe before, and you can find that here. But here's the thing: that recipe, as it is, is disgusting. So here's how I ACTUALLY make my version of the Wilton buttercream frosting.

Recipe

Buttercream Frosting

1 cup unsalted butter, softened
2 teaspoons vanilla
3 tablespoons milk or water
4 cups confectioners' sugar
1 tablespoon meringue powder
pinch of salt (optional)

Cream together butter, vanilla, milk/water and salt if using (it's good to dissolve the salt in the liquid, otherwise it might dissolve later in your frosting and mess up the colours). Add confectioners' sugar 1 cup at a time, mixing well at medium speed after each addition. Add the meringue powder with one of the cups of sugar, and continue mixing on medium speed until all ingredients have been thoroughly mixed together. Mix for an additional minute or so, until creamy.

This recipe makes about three cups of stiff consistency frosting. Wilton has three consistencies they use in class and it's actually pretty useful to know them and what they're used for.
Stiff consistency is used for things like flowers with upright petals, like the Wilton rose or sweet peas.
Medium consistency is used for stars (with the star tips), figure piping, borders (like the shell border) and flowers with petals that lie flat. To make medium consistency frosting, add one teaspoon of water for each cup of stiff frosting, or one tablespoon if you want to make the full recipe medium consistency.
Thin consistency is used for writing, making vines, leaves and frosting the cake. To make thin consistency frosting, add two teaspoons of water for each cup of stiff frosting, or two tablespoons for the full recipe.


Guten Appetit!
Continue reading...