August 24, 2008

Wild Blueberry Galette


I have discovered my new favourite pastry. It's much simpler than a pie, and to me, much prettier. It's a galette. I made one for the first time on Thursday for a dinner I was having at Anders' house with his family. I got the recipe from this foodblogger, who posted it on Bake! Bake! Bake! I mostly followed it, too, and it did not disappoint. Oh no, it didn't.

The filling was blessedly simple. I love a simple filling.

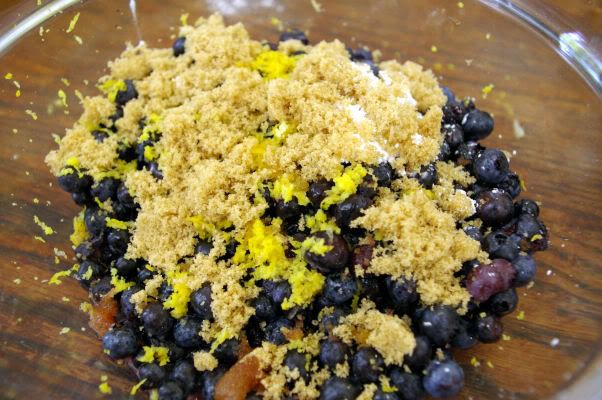
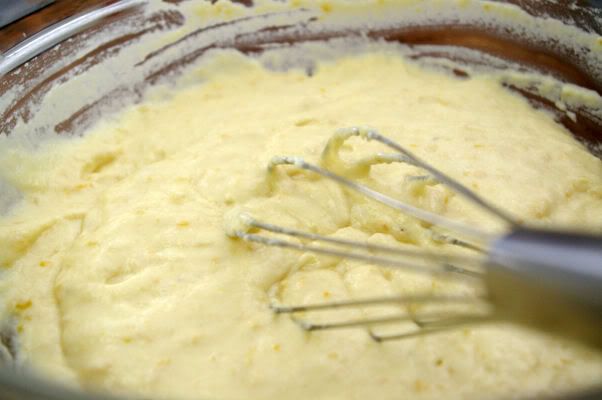
Wild blueberries, lemon juice and zest, sugar and cornstarch. Could it be any simpler?

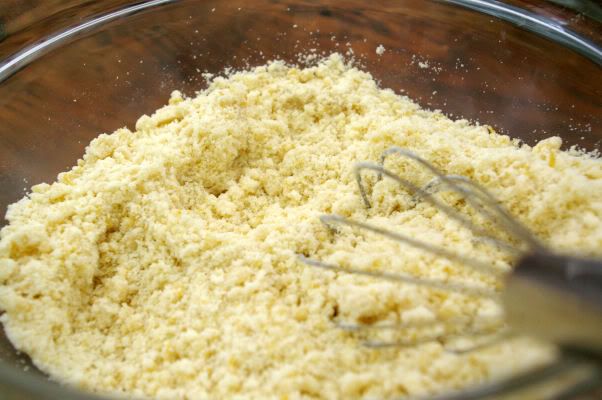
The only other thing I needed was a pie crust. I went for my lovely olive oil recipe.

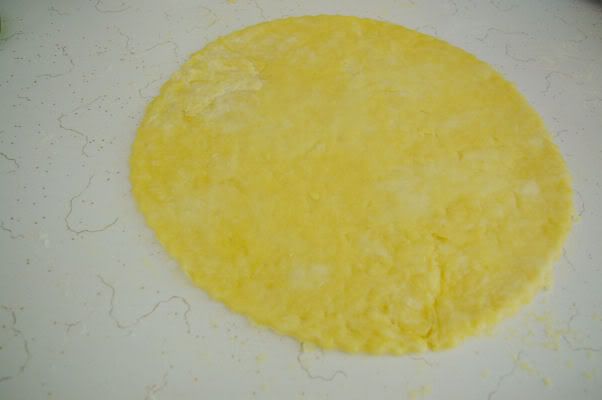
To get a nice, perfectly round crust to work with, I used the serving dish I planned to use as a cookie cutter and pressed it into the dough.

As I said, this is a simple recipe, and all I had to do with the filling was pour it into the centre of my crust.

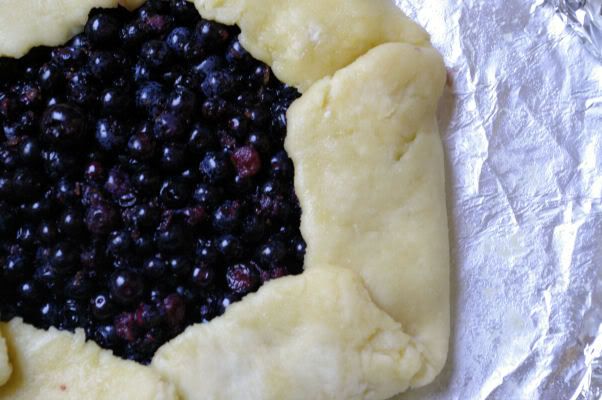
And then fold up the edges to hold it all in. I tried to make my pleats as pretty as possible.

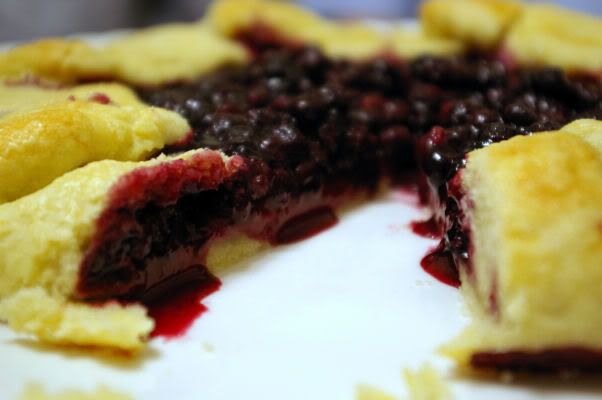
It's not hard to make a dessert look good when you're working with berries that look this delicious.


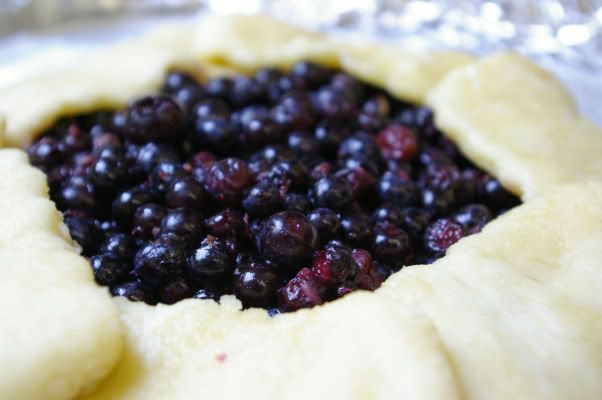
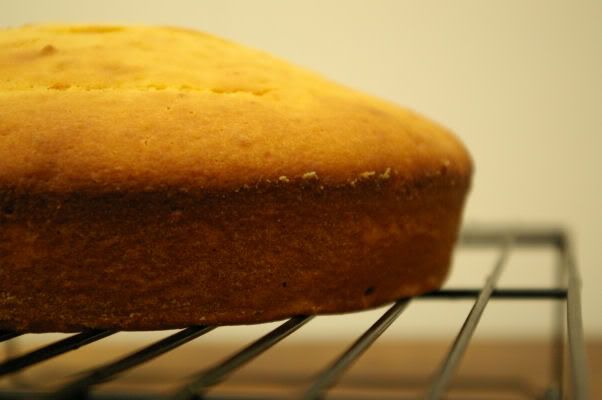
The galette baked on a piece of tin foil on top of a cookie sheet for about 30 or 35 minutes.

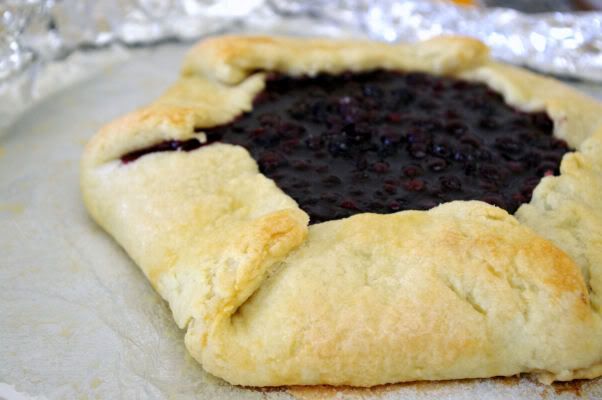
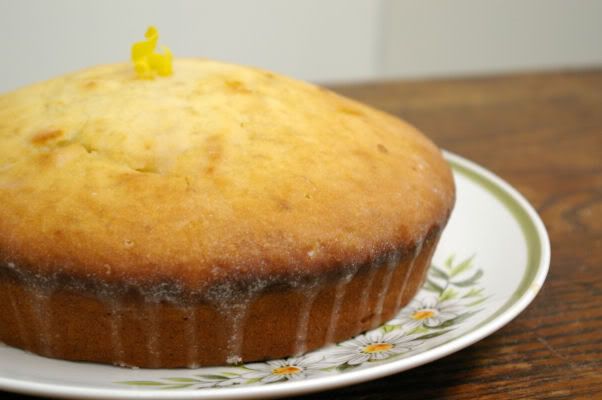
And came out looking perfectly scrumptious, if I do say so myself. And I do.

This dessert was enjoyed by all (nine of us!) later that evening.


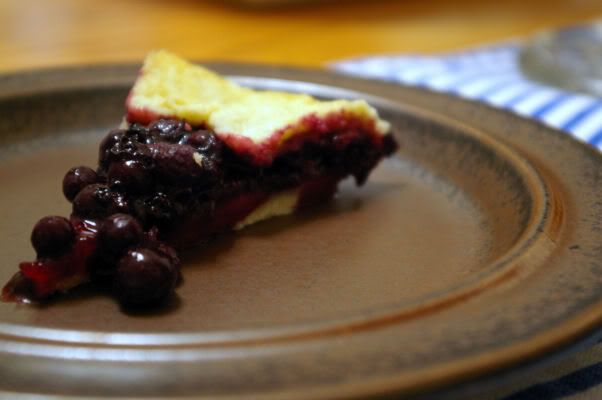
I am I love with this recipe. I think it's a great alternative to pie, especially if you're only feeding a small crowd (which I wasn't, really, but it worked out, because we had THREE kinds of dessert). I found the lemon a little too strong, so I will definitely reduce that amount when I make this next time, and there will definitely be a next time. In fact, we have some soft peaches in the fridge that I might try in a galette next!
If you're one of those people who can't seem to get pie crusts right, whether it's because they always shrink in the oven, or putting them into the pie plate is simply a chore, try a galette! You won't be disappointed... and you'll probably be more relaxed!

Recipe

(Wild) Blueberry Galette

1 premade pie crust
1 pint fresh (wild) blueberries
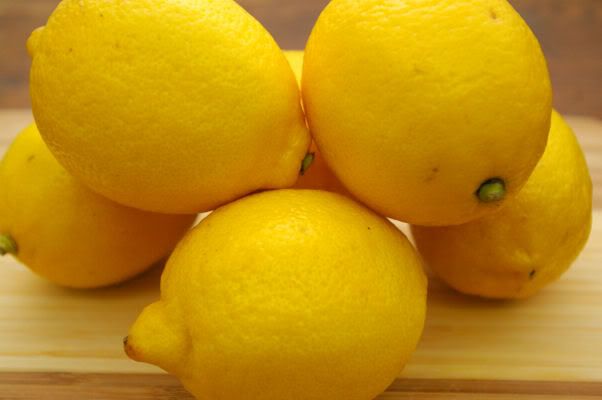
zest of one lemon
2 tablespoons lemon juice
1 ½ teaspoons cornstarch
brown sugar*, to taste (I think I used 1 ½ tablespoons)
egg wash

×××

Preheat the oven to 350°F. Cover a cookie sheet with tinfoil and spray with non-stick cooking spray. Roll out pie crust to form a large circle and place on the prepared cookie sheet. In a medium bowl, gently mix together blueberries, lemon zest and juice, cornstarch and sugar. Pour the filling onto the centre of the crust and fold and pleat the edges around the filling. Brush with egg wash and sprinkle with sugar. Bake for approximately 30 to 35 minutes, or until edges are golden brown and filling bubbles. Allow to cool before removing to a serving plate. Serve slightly warm or at room temperature.

*The original recipe called for white sugar, but I like brown sugar better in a pastry.

Guten Appetit!
Continue reading...

August 22, 2008

Granola Bars: An Update


Remember the granola bars from a few posts ago? Do you remember how all the ingredients were measured in weights, instead of cups? Well, I made them again yesterday and decided I would measure all the ingredients in cups so I could post those amounts here... since I'm guessing that most of my readers would use cups rather than a scale. So here it is!

2 1/3 cups rolled oats
1/3 cup plain flour
½ cup vegetable oil
3/4 cup honey
1/4 cup brown sugar
2-3 tablespoons smooth peanut butter (or Nutella)
3/4 to 1 cup shredded, unsweetened coconut
1 1/3 cups assorted nuts and seeds
1 1/3 cups assorted dried fruit

To get a refresher on the rest of the recipe, check out my original post!
Continue reading...

Pasta Fresca


Do you love tomatoes? Do you love fresh, local, summer tomatoes that make you want to eat them whole because they're just so darned delicious? Do you like garlic? And basil? Lots of basil? Do you like answering lots of questions about food?!

If you answered yes to any or all of these questions, you need to make Pasta Fresca. Quickly! Go out and get tomatoes now! They're in season and won't get any better. And you cannot make this dish in the winter, or even when the tomatoes are just out of season. So go!!

I always start by cutting up half a pound of mozzarella cheese into small cubes.

And then I throw it in the fridge until I'm ready to use it.

Next, I roughly cut up tomatoes, about 4 cups.

Okay, so you don't need this many tomatoes to get four cups.

And then I throw a whole bunch of garlic and basil into the blender with some olive oil.


The tomatoes go in the blender next, and I add salt and pepper to taste.


Vrrrroooooommmmm!!


The sauce goes into a microwave safe bowl until it's ready to be used.


The last thing to happen is to cook pasta. Okay, I also chiffonade some basil and chop up an extra tomato for garnish.

When the past is done (and just done, overcooked pasta is the worst), I mix the pasta, cheese and sauce together in layers.


And finally, top it off with some tomatoes and basil!


This pasta dish is a delicious dining experience. It's nice a light dinner on those hot August nights, and it's simple and so quick! If you have any respect for the combination of tomato, basil and garlic at all, you'll go out and get the ingredients and make it right away!

Recipe

Pasta Fresca
from Moosewood Cooks at Home

4 cups + 1 cup chopped, ripe tomatoes, de-seeded
10-15 fresh basil leaves
2 medium to large garlic cloves, pressed
1 tablespoon extra-virgin olive oil
salt and freshly ground pepper to taste

1 pound fusilli pasta

½ pound fresh mozzarella cheese, cut into small cubes (store in fridge until needed)
grated Parmesan or Pecorino cheese (optional)

×××

Roughly cut up and de-seed the tomatoes. Put the basil, garlic, olive oil and 4 cups of tomatoes into a blender and puree. Add salt and pepper to taste. Pour into a microwave-safe bowl and set aside until ready to use. Cook the pasta to al dente and drain, but do not rinse. Heat the sauce in the microwave for about 30 second, until just slightly warmer than room temperature. Pour a third of the pasta, sauce and cheese into a serving bowl and mix gently. Repeat until all the pasta, sauce and cheese is used up.
Serve with remaining cup of chopped tomato and chiffonade basil.

Guten Appetit!
Continue reading...

Lemon Cake with Lemon Glaze


Remember how I said my chocolate cake recipe was versatile? I wasn't lying. Because this lemon cake recipe is a wild adaptation of that recipe. Well, maybe it's not wild, but it is an adaptation.

The first time I tried it I really neglected the wet to dry ratio and ended up with a lemon-flavoured pancake. A lemon-flavoured pancake that was not fully baked. And that explains why there aren't a lot of photos. I completely switched up the method when I made it the second time and didn't take photos the second time around.

The recipe starts with fresh lemons. Mmm.


I started by grating the zest off the lemons, and then juicing them. I think I used two lemon, but I squeezed them really well with the mighty juicer we have. It may take more if you're not using such a mighty juicer.

Then, I mixed together the dry ingredients, which consisted of flour, baking powder and soda, and sugar. To that, I added oil, lemon zest and vanilla.


I left the lemon juice out still, because it makes the baking soda react, and I didn't want that to happen until just before the batter hit the pan.


And then I poured it into my greased and floured pan.


After being in the oven for longer than I had planned (because I used an 8 inch pan, rather than a 9 inch pan like I was supposed to), the cake looked and smelled deliiiish.


Once it had cooled, a poured a simple lemon glaze over it.


And once that had set, I added a few curled pieces of zest to decorate.


I enjoyed this cake with my parents after we ate a delicious dinner of Pasta Fresca (coming soon to a blog near you).


Oh my gosh. This cake was so moist and perfectly lemony. It wasn't too sweet, and it was lovely and light. We loved it. It really was perfect. And delicious. And I want more, now that I've written this little devotional.

Recipe

Lemon Cake with Lemon Glaze

2-2 ½ cups unbleached white flour
1 teaspoon baking powder
1 teaspoon baking soda
½ teaspoon salt
1 cup sugar
½ cup vegetable oil
2 tablespoons lemon zest
2 teaspoons vanilla extract
½ - ¾ cup freshly squeezed lemon juice

×××

Preheat oven to 375°F. Lightly grease a 9-inch round or 8-inch square cake pan, and dust lightly with flour. Sift together the flour, baking powder, baking soda, salt and sugar into a bowl. Add the oil, lemon zest and vanilla and mix the batter with a fork or small whisk. When the batter is smooth, add the lemon juice and stir quickly. The batter will foam slightly where the baking soda and the lemon juice are reacting. Stir just until the lemon juice is evenly distributed throughout the batter. Pour the batter into the cake pan, and bake for 25 to 30 minutes. Allow to cool before glazing or frosting.

Lemon Glaze

2/3 cup confectioners' sugar
2 tablespoons lemon juice, fresh
1 teaspoon lemon zest (optional)

×××

Sift the sugar into a bowl. Add the lemon juice (and zest, if using) and whisk until smooth. Pour over cooled cake.

Guten Appetit!
Continue reading...

August 18, 2008

Healthy Banana Cookies


Two healthy recipes in a row?! Is this a baking blog, or is it a sissy natural food store blog? Okay, I didn't mean that. I like natural food stores. They have the best peanut butter. And their baking stuff is usually cheeeeap. And I like goat's milk soap. And organic produce.

Okay, let's move on...

Healthy banana cookies... it's another one of these recipes you can use your almost inedible bananas in, and I love those recipes, because I can only consume so much banana bread and so many banana muffins. And I really don't like wasting fruit. It makes me sad and I feel very guilty throwing those things in the green bin.
The other great thing about these cookies? They're easy. And another? They're soft. And another? They're chewy. And another? You can sort of throw whatever you want in. Sort of.


I started by mashing up some bananas, and throwing in oats, coconut, dried cranberries (left over from the granola bars), oil, vanilla and a bunch of cinnamon and nutmeg.


I mixed that all up and let it sit for about 15 or 20 minutes.


At that point, I decided it was too wet, so I added some more oats, and let it sit for a little while longer.

Then, I pulled out my trusty 1/8 cup measure to scoop the batter.


Seriously, 1/8 measure makes for the perfect size cookie.

These cookies don't flatten out during baking, so I used a spatula to press them down.


These went in the oven for about 20 minutes.


As I said, these are soft, and chewy and flavourful and light and delicious. And they're healthy. It's great. So next time you have brown bananas, make these!

Recipe

Healthy Banana Cookies

3 ripe bananas
2 ½ cups rolled oats
¼ cup dried coconut (optional)
1 cup dried fruit (like cranberries, raisins, dates, etc.)
Cinnamon to taste
Nutmeg to taste
1/3 cup canola oil
1 teaspoon vanilla extract

×××

Preheat oven to 350°F. In a large bowl, mash the bananas. Stir in oats, dried fruit, spices, oil, and vanilla. Mix well, and allow to sit for 15 minutes. Using a ¼ cup measuring cup, scoop the batter and drop it onto an ungreased baking sheet. Bake for approximately 20 minutes, or until lightly brown. Allow to cool slightly and then remove cookies to cool completely on a wire rack.

Guten Appetit!
Continue reading...

Granola Bars


I'm here, as promised, to update you on the myriad things I've baked and cooked recently. This morning I pushed my camera's memory card into the slot on my computer and thought "oh crap, what was I thinking not posting these things as I did them. Work be damned, I shouldhave just updated the blog instead!!" Now, I have four recipes to post. Maybe that doesn't sound like that much but look at my previous posts! They're long and detailed. And even as I type this I'm trying to figure out how to do it... all in one post or a post for each one. I think the latter is probably a better idea. So here we go...

I'm going to start with granola bars. Oh. My. These bars make me wonder why mass-produced granola bars even exist, or why anyone has ever bought them, or thought they were healthy. These are so simple and customisable, I really have no reason to ever buy granola bars again.

This process started with a lovely trip to Bulk Barn.


This places rocks (my gypsy soul?). It's easy to spend a lot of money though. Especially when you're like me and you buy things like dried pears, instead of the normal dried fruit... whatever.

I got this recipe from Kitchen Wench, and shock and awe, I basically followed it. Because the recipe is in weights (which I'm very much not used to, being a silly North American and all), I had to pull out my mum's trusty kitchen scale.


I actually shouldn't comment on its trustworthiness... I think I've used it about three times. It's because I'm a silly North American and hardly any recipes even mention the weights of ingredients.

For these bars, I decied to use dried cranberries, golden raisins (much better than red), and dried pears.


I took a knife to them and chopped them up to about the size of sunflower seeds.

I kind of splurged and used hazelnuts for these bars... I also used roasted (unsalted) peanuts, and sunflower seeds.


I had to chop up the peanuts and hazelnuts, as well.

Then, I threw the fruits and nuts into a big bowl with some organic muesli. It was supposed to be rolled oats, but I saw the muesli at Bulk Barn and just bought it... I'm impulsive like that. I also threw in some coconut.


This on its own would be delicious for breakfast.

To hold all this together, I had to used a few sticky ingredients, including honey (and some Nutella, because I didn't have enough honey), peanut butter, oil and brown sugar.


I let that all melt and get gooey in a pot.

While it cooled a little bit, I threw some flour into the dry ingredients and mixed it all up so everything was coated.


And then I dug a little hole into it and poured in the wet ingredients.


Mixing it all together was fun... sticky and gooey.


To bake the bars, I lined a pan with parchment paper, and then pressed the granola mixture into the pan.


It was amazing how much these would compact.

The pan went into the oven for about 35 minutes, and then came out and cooled for about 20 minutes before I cut them up. I couldn't let them cool completely, or they would have just shattered when I put the knife anywhere near them. It was easy to remove from the pan, too, with the parchment paper. I cut the mass that would soon be bars in half, lengthwise, first, and then cut each half into 10 3/4" width bars. That's right... 20 bars from one recipe... that's right, enough for two people for two work/school weeks. Could this recipe be any better?!

And look how delicious they look!


Mmm. These really were great. Healthy and chewy and easy to take to work, or pick up for a quick snack before my run. Next time, I would use a bit more wet ingredients, because the bars did tend to break up a bit. I also wouldn't bake them as long. After 35 minutes in the oven, these were a bit more roasted than I would like. But they really were worth making and I will be making them again as soon as I can get out to Bulk Barn!

Recipe

Granola Bars

320g rolled oats
1/3cup plain flour
100mL vegetable oil
200g mild honey (try 100g honey and 100g golden syrup for a deeper flavour)
50g brown sugar
2-3 tbsp smooth peanut butter (or Nutella)
40g shredded, unsweetened coconut
150-200g of assorted nuts and seeds
150-200g assorted dried fruit

×××

Preheat oven to 325°F, and line an 35×25cm (or close) baking pan (Pyrex or a metal cake pan both work) with parchment paper.
Roughly chop the nuts and larger pieces of dried fruit into smaller pieces (about the same size as a sunflower seed). Then place the chopped nuts and fruit into a bowl with the oats, coconut and flour and stir together with a wooden spoon until well combined. Slightly heat the honey in a pot on the stove, then add the sugar, peanut butter and oil and whisk together thoroughly. Pour together the wet and dry mixture and mix to combine. If the mixture does not seem to stick together well enough, add more honey. Dump the mixture into your prepared pan. Wet your hands with some cold water, and using both the wooden spoon and your hands, pack the mixture down flat, making sure to get it into the corners.
Bake for 25-35 minutes if you prefer a softer, chewier bar, and up to 50-60 minutes if you prefer a crunchier one (the longer baking time will roast the ingredients quite a bit). During the baking process, use a wooden spoon or rubber spatula to press down on the mixture every 10-15 minutes.
Allow to cool for 15-20 minutes after baking, then carefully remove from the pan. Using a sharp knife, cut into bars. These can be stored in an airtight container in a cool place for up to 2 weeks. Keep a sheet of parchment paper between each layer of bars.

Guten Appetit!
Continue reading...

August 11, 2008

I'm still alive (and, more importantly, baking).

Would you believe me if I said I'm still baking up a storm on a regular basis, but that my job drains me so thoroughly that I haven't had the wherewithall to sit down, upload all the photos, edit them, and then upload them online, type out instructions and witty quips and recipes, and then actually post it all in some coherent sort of way? Please say yes.

Not that I'm counting or anything, but I'm done work in 4 days, 7 hours and 10 minutes, so here's what you have to look forward to in the near future: delicious, nutritious granola bars, tangy lemon cake (adapted from my chocolate cake recipe), healthy banana oat cookies with dried cranberries, and a delicious summer dinner dish called Pasta Fresca. Your life won't be the same after you try it. I'm also hoping to give frozen yoghurt a try this week. Am I crazy? I don't even have an ice cream maker! Continue reading...