August 18, 2009

Guacamole and Home-made Flour Tortilla Chips


Once upon a time, I made flour tortillas to use as wraps for a meal I made for myself and Anders. I never posted them because when I rolled them out they turned out to be more pointy and mishapen than circular. But they were tasty. Now, the other day I bought a bag of avocadoes. I don't really like avocado that much, but they're full of healthy fat and nutrients so I decided to just get them and maybe make myself like them. Instead I just went ahead and made guacamole a few days after buying them because that's really the only way I like to eat them. And to eat guacamole you need some chips. But have you ever noticed how much crap is in tortilla chips? Ugh. I have. So I decided to take that recipe for soft tortillas I had made before and make them into chips! That's right, folks. This post is a twofer! Guacamole and tortilla chips ho!

I started with the tortilla chips first, because the dough needs time to rest in between steps.

I started with some flour, baking powder, salt and canola oil.


I added some warm milk.


And that's it. Five ingredients, minimal mixing and I got this pleasant lump of dough, which I kneaded until it was well combined and smooth.


I threw the dough into the bowl I mixed it in and put a damp dish cloth over top. I let it rest for about 20 minutes.

Now, this next part is a lie, because I was multi-tasking the whole time and while the dough was resting I started on the guacamole, but to keep things simple, I'll continue with the tortilla chips.


After 20 minutes, I split the dough into four more or less equal parts.


And let them rest again. This dough needs a lot of rest, or it will be tough and gross.


After the second rest, I split each ball of dough in half and I rolled each one out very very thin. They do shrink back up a bit though. I didn't worry to much about how circular they were, because I was just going to butcher them anyway to make the chips.


Using my (dry, unoiled) cast iron pan, I...fried, baked?... each tortilla for about 30 seconds per side. They start to puff up a bit and turn brown in spots, so it's easy to tell when they're done.


When they were all done, I cut each tortilla into 8 triangular(ish) pieces.
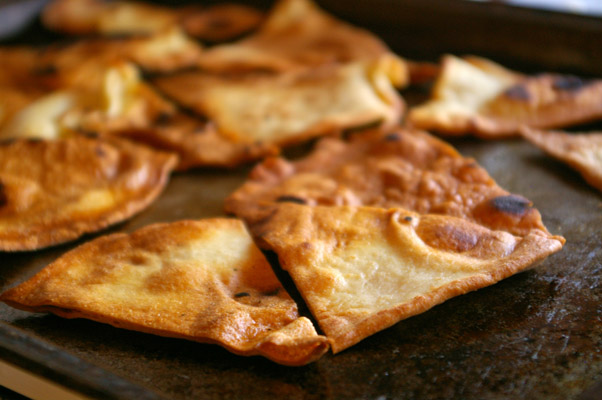

I put those on a baking sheet, which I had first sprayed very lightly with canola oil. I also gave the soon-to-be-chips a light spray. This is what they looked like after baking for about 12 or 13 minutes.

Next, I worked on my guacamole!
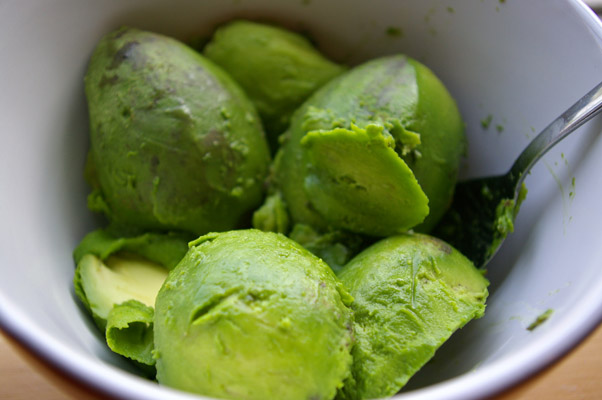

Naturally enough, I started with avocadoes! What a lovely colour!


Next, I Chopped up some tomato.


And some green onion.


I threw those two things into my bowl with my avocadoes along with some lime juice, chili powder, cumin, salt and pepper.

Now look. I know you're supposed to put cilantro in guacamole. And no, I haven't done that. I have a confession. I hate cilantro. And I know very few people who DO like it so I don't feel bad about it! It makes me feel like my throat is closing up. That isn't a good feeling when you're eating! So I avoid it. I hope you understand.

Anyway... I don't like to mash my avocado before adding the other ingredients. I find that it just turns into paste when you do that and I don't like it. Guacamole should be think and rustic, not smooth and pasty.

So instead I just take a metal spoon to it and stir, breaking up the avocado as I see fit. And I also add some garlic because I realise I forgot it... and then I don't add enough. Whoops!
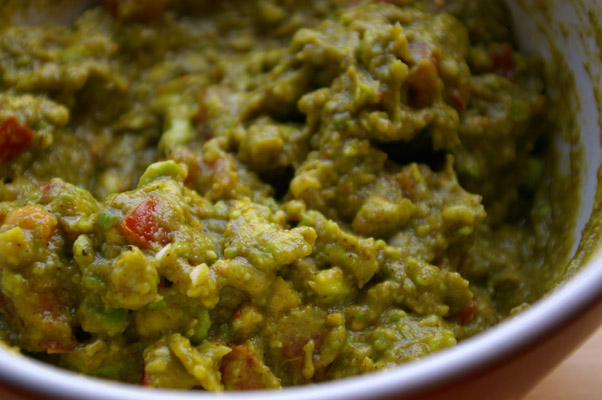

There we go. Oooh, look at it. Tastyyy.


Ooh, both together. Don't you want to just dive into the photo?
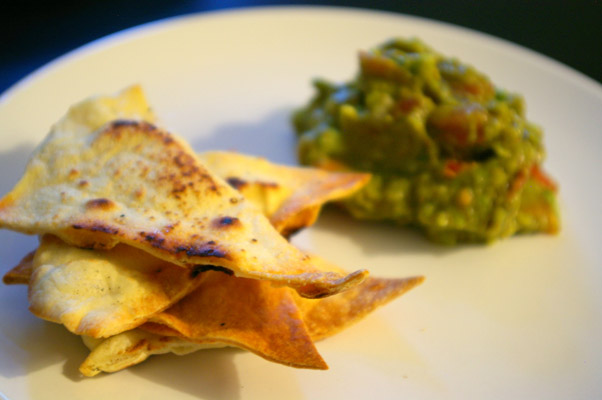

Delicious!


Okay. So I love guacamole. But it's nothing too new or exciting, so let's talk about the tortilla chips. They were good! They weren't WAY too salty like the store-bought ones, they had a nice light flavour and they were just... tasty. My only complaint is that some of them were a bit too crunchy but that was my fault. The only ones that were too crunchy were the darker ones, so they were obviously a bit over-baked. Next time I do this, and I definitely will do this again, I would decrease the baking time slightly. Other than that, they were great! I was pleased to be able to just sort of make it up. I spent a lot of time looking online for a recipe for tortilla chips, but I came up with nothing. Luckily it was easy to simply decide to make these into chips.

Recipes

Flour Tortilla Chips

×××

2 cups of all-purpose flour
1 ½ teaspoons of baking powder
1 teaspoon of salt
2 teaspoons of vegetable oil
¾ cups of warm milk

×××

Mix together the flour, baking powder, salt and oil. Slowly add the warm milk. Stir until a loose, sticky ball is formed. Knead for two minutes on a floured surface. Dough should be firm and soft. Place dough in a bowl and cover with a damp cloth or plastic wrap for 20 minutes.
After the dough has rested, break off eight sections, roll them into balls in your hands, place on a plate (make sure they aren’t touching) and then cover balls with damp cloth or plastic wrap for 10 minutes. After dough has rested, one at a time place a dough ball on a floured surface, pat it out into a four-inch circle, and then roll with a rolling pin from the centre until it’s thin and about eight inches in diameter. Don’t over work the dough, or it’ll be stiff. In a dry iron skillet or comal heated on high, cook the tortilla about thirty seconds on each side. They should start to puff a bit when they're done.
Preheat the oven to 350°F. Cut the cooked tortillas into eighths and arrange a few pieces on a very lightly oiled baking sheet (canola oil spray works well). Spray the tops of the tortilla pieces very lightly with canola oil. Place in the over for 10 to 12 minutes, or until the chips are brown and crispy. Cool slightly before eating.

Guacamole

×××

4 small or 3 medium avocadoes
2 small or 1 large tomato(es), chopped
6-8 green onions, chopped
3 tablespoons lime juice
2 cloves garlic, crushed
2 teaspoons chili powder
2 teaspoons ground cumin
salt and pepper to taste

×××

Cut avocadoes in half and scrap fruit into a bowl. Add chopped tomato and green onion, garlic, chili powder, cumin and salt and pepper. Stir and break up avocado. Serve with tortilla chips or pita bread or something equally delicious.

Guten Appetit!
Continue reading...

August 14, 2009

Wilton Course 1 Class 2


Last night I had my second Wilton class in which we decorated our cakes with the Wilton rainbow!

On Wednesday night I baked my cake.

Now, I did two things I don't normally do. I used a mix and I wet a dish towel and wrapped it around the pan to make it bake more evenly.
I don't like that mixes call for so many eggs. Three? Geez! But I do love the homemade bake-even strip I used. In the first Wilton class the instructor suggested we get the Wilton brand ones, but using a dish towel is a lot more... free. So all I did was roll up a dish towel to fit the height of the cake pan, soak it, ring it, wrap it around the pan and secure it with a couple of safety pins. It made my cake bake completely evenly. I didn't have to level it at all and the outside edge wasn't over-baked. It was excellent.
I did have to bake the cake for about ten minutes longer, because the wet towel kept the pan cooler than normal. But if you're planning on using this trick, make sure to check the cake around the suggested baking time and determine just how much extra time it will need!

Anyway, yesterday I spent a tonne of time making different frostings and then frosting the darned cake.

I'm really not good at frosting cakes. It took me about an hour and it was really uneven and not very smooth. But I let the frosting set for a bit and then rubbed it down with parchment paper to try to smooth it out a bit. If you'd like a tutorial for that, check out this video! This lady does it with a paper towel, but you can do it with parchment, as well.

Finally, I took the half hour bus ride to Michael's (the bus system sucks here) and decorated my cake!

It turned out pretty well! The colours were insanely bright (although the photos make them look brighter than they actually were), and I managed to make my rainbow pretty even. It was fun to do, too.


When I got home, a good friend came over and shared some with me.


So I just have to say, I think the Wilton "butter"cream is disgusting. It's all shortening and no butter. It tastes like sugar and chemicals. I think next week I'll frost the cake with a real buttercream and just decorate with the Wilton buttercream. If you're interested, the recipe for the Wilton buttercream is below. I think I would probably stick with the basic recipe, but replace the shortening with butter - I think then it would be pretty decent.
Overall, however, I'm pleased with the class! It's fun to learn some decorating techniques, even if they are really simple. I'm hoping that after I'm done this course, I can just find the books for the other courses and follow those instead of doing the other courses. Mostly because it's ridiculously impractical for me to get to Michael's, but also because it's all pretty well laid out in the books and now that I've learned how they teach things in the courses, I think I can just transfer it to the next levels. I think I would recommend the first course to anyone who wants to learn the basics of frosting!

Recipe

Wilton Buttercream
1 cup solid white vegetable shortening*
1 teaspoon Wilton Flavour**
3 tablespoons milk or water
1 lb. confectioners' sugar (approx. 4 cups)
1 tablespoon Wilton Meringue Powder***
pinch of salt (optiona)

Cream together shortening, flavour, water and salt if using (it's good to dissolve the salt in the liquid, otherwise it might dissolve later in your frosting and mess up the colours). Add dry ingredients and mix on medium speed until all ingredients have been thoroughly mixed together. Mix for an additional minute or so, until creamy.

*they suggest Crisco because it's very white
**my instructor recommended a mixture of colourless vanilla and butter flavours, but I just used regular vanilla... coloured and all
***this helps stabilise the frosting - I actually like the product.

This recipe makes about three cups of stiff consistency frosting. Wilton has three consistencies they use in class and it's actually pretty useful to know them and what they're used for.
Stiff consistency is used for things like flowers with upright petals, like the Wilton rose or sweet peas.
Medium consistency is used for stars (with the star tips), figure piping, borders (like the shell border) and floweres with petals that lie flat. To make medium consistency frosting, add one teaspoon of water for each cup of stiff frosting, or one tablespoon if you want to make the full recipe medium consistency.
Thin consistency is used for writing, making vines, leaves and frosting the cake. To make thin consistency frosting, add two teaspoons of water for each cup of stiff frosting, or two tablespoons for the full recipe).
Continue reading...

August 12, 2009

Changes

Hello friends, devoted readers, and visitors. I've just changed the layout of CCbmB and I've also changed the format of my posts. Not much has changed in the layout itself, but the format of the posts has changed. To read more about it...
I just wanted to change things around so that my front page wasn't bogged down with long posts, full of my process photos. This way, I'll have an introduction photo of the finished product on the front page, and the rest of the post, including process photos, commentary and recipes will appear after the link labelled "Continue reading..." I hope this makes the navigation and viewing of my CCbmB easier and more enjoyable for everyone!

As for what's going on with me right now, I'm still unemployed and thus unable to really buy too many extra groceries to be used in baking. Plus I don't have a 6'1" distance runner boyfriend in the apartment at the moment to share them with. None of that, of course, has stopped me from taking The Wilton Method of Decorating Course 1. So I will be updating the world on my progress in the class, as I currently have no decorating skill.
And with September comes more money (hopefully) and the return of the aforementioned boyfriend, so my posts should be more regular and more interesting (hopefully).

Thanks for keeping up with me and my fun in the kitchen!
Continue reading...